
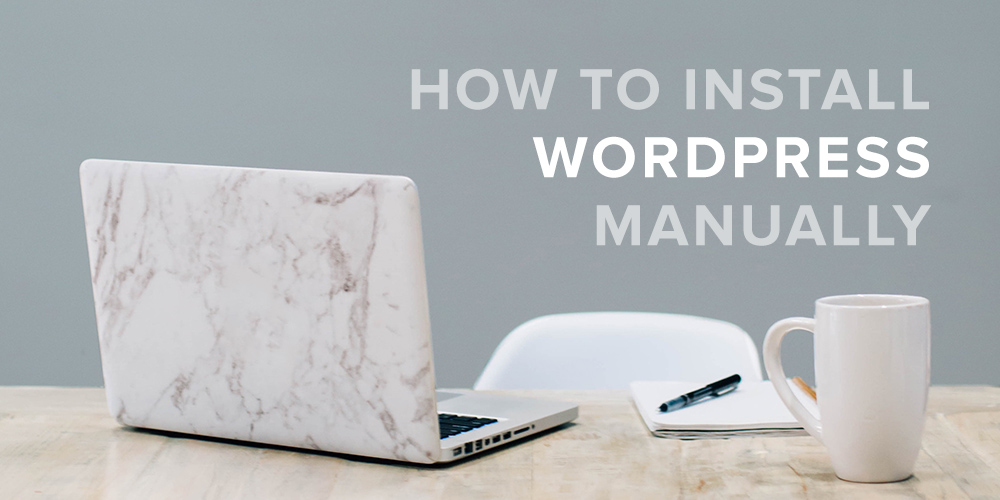
How to Install WordPress Manually – WordPress is a popular content management system (CMS) used for creating websites and blogs. While many hosting providers offer one-click installations for WordPress, you may need to install it manually if you’re using a custom hosting environment. In this process, you will need to download the WordPress installation package, create a database, upload the files to your hosting account, and run the installation script. In this guide, we’ll walk you through the steps required to install WordPress manually.
How to Install WordPress Manually
1. Download the latest WordPress version from https://wordpress.org/download/.
2. Create a database for your WordPress installation on your web server, as well as a MySQL user who has all privileges for accessing and modifying it.
3. Upload the files to your server using an FTP client such as FileZilla or Cyberduck, or use SSH commands if you have access to the command line of your server.
4. Navigate to http://yourdomainname/wp-admin/install.php in order to start the installation process by providing details such as database name, username, and password that you had created earlier in step 2 . 5. After submitting these details, follow the instructions provided by the WordPress setup wizard which should guide you through rest of installation process easily (including setting up title & description of the website).
- Download the WordPress package: The first step to manually installing WordPress is to download the software from https://wordpress
- org/download/
- This will give you a zip file containing all of the necessary files for a standard WordPress installation
- Create MySQL Database and User: Next, you need to create an empty MySQL database and user so that your WordPress install can store its data in it
- You can do this through your web host’s control panel or via command line utilities like phpMyAdmin if available with your web hosting account
- Upload Files to Your Server: After downloading WordPress, extract the zip file onto your computer then upload them into a directory on your server using an FTP client such as FileZilla or Cyberduck etc
- , making sure that all of the files are placed inside their respective folders on the remote server exactly as they were in the local folder structure on your PC / Mac before uploading them over FTP connection
- Configure wp-config File: Now we have successfully uploaded our files; next, we’ll need to configure our wp-config file by opening it up using any text editor program (for example Notepad++), replacing some placeholder values indicated in there with our own database details created earlier – such as DB_NAME, DB_USER, DB_PASSWORD etc
- , save changes made & close this document afterwards
- Run Installation Scripts : Finally , open up URL pointing towards location where these WP files were installed at ; here you should be presented with GUI based install script which will guide you through rest of setup process until successful completion occurs
Credit: www.wpexplorer.com
How Do I Manually Install And Configure WordPress?
If you want to manually install and configure WordPress, the process can seem a bit confusing at first. But with just a few simple steps, you’ll be able to set up your own WordPress website in no time! First, download the latest version of WordPress from their official website.
Make sure that you have all of the necessary files (including an FTP client) as well as any database software such as MySQL or MariaDB on your computer. Once all of these are ready, then create a new database by logging into your hosting account’s control panel and clicking “Create Database”. After this is done, it’s time to upload the WordPress files onto your server using an FTP program like Filezilla.
You can also use cPanel if available with most hosting accounts for easy file management. Next, open up the wp-config file located inside the root folder and enter in all of your information including hostname, username, password and database name. Finally run through installation by accessing http://yourdomain/wp-admin/install.php in your browser which will take care of setting up everything else for you automatically.
With just these few basic steps completed correctly you should be running on a fully functional install within minutes!
How Do I Manually Install WordPress for Free?
Installing WordPress for free is a relatively simple and straightforward process. There are two ways to manually install WordPress, either by downloading the software from the official website or via an FTP client like FileZilla.
If you choose to download the software from wordpress.org, simply navigate to the ‘Download’ page and click on the “Get Started Now” button.
On this page, you will be prompted to enter your email address, username, password and site title before downloading a zip file containing all of the necessary WordPress files and folders that need to be uploaded onto your web hosting account in order for it work properly. Once done with this step, unzip all of these files into a folder ready for uploading via FTP later on in step 3 below (if applicable).
The other option is if you want to use an FTP program such as FileZilla; firstly make sure that you have successfully created a database within your web hosting control panel prior doing anything else.
Then access your webspace using FileZilla or another reliable FTP program so that can upload all of those previously downloaded/unzipped WordPress files onto there – do not forget about setting up appropriate permissions afterwards too! After everything has been uploaded correctly then carry out some basic configuration steps through accessing wp-admin directly in which case should complete our manual installation procedure without any issues at hand!
How Do I Manually Install WordPress on Windows 10?
If you’re looking for a way to install WordPress on your Windows 10 computer, then you’ve come to the right place. WordPress is an incredibly popular content management system (CMS) that allows users to create and manage websites quickly and easily. It’s an open source software package that can be installed either manually or through web hosting providers like GoDaddy or Bluehost.
Installing it manually requires a few steps, but if followed correctly, it can be done in no time at all.
The first thing you’ll need to do is download the latest version of WordPress from wordpress.org/download/. Once downloaded, extract the files into a folder on your computer where they will remain until they are uploaded onto your server later on in the process.
The next step is setting up a database for WordPress; there are several options available such as MySQL or MariaDB which both work great with Windows 10 systems. After creating the database, ensure that it has been configured properly by entering necessary information such as username and password into its configuration file located within the same directory as extracted files from earlier in this tutorial (wp-config-sample).
With everything ready and set up appropriately, move onto uploading all of these files via FTP client—such as FileZilla—onto your hosting provider’s server so that they can then be accessed publicly via URL address provided by them when signing up for their service plan initially; navigate inside “public_html” folder once connected successfully before beginning uploading process itself.
Now open up browser window after completing upload phase and type in previously mentioned URL address along with “/wp-admin/installer” at end of line—this should begin installation phase automatically unless user needs enter further information regarding language settings etc…otherwise click submit button afterwards confirm completion overall!
How Can I Install WordPress Locally?
Installing WordPress locally is a great way to get familiar with the platform, test out different themes and plugins without affecting your live website, and even develop custom themes or plugins. The good news is that setting up WordPress on a local computer (known as “localhost”) isn’t difficult—all you need is a web server like Apache, PHP, and MySQL installed on your machine. Here are the steps for installing WordPress locally:
First, download the latest version of WordPress from wordpress.org/download/. Then extract it into an empty folder in your local drive—it can be anywhere you want it to be located. Second, create a database for WordPress using either PhpMyAdmin or any other database management system such as MySQL Workbench.
Once created make sure to note down its name along with username & password which will be used later during installation process. Thirdly open wp-config-sample.php file located inside extracted folder and enter details of newly created database into this file such as hostname(usually ‘localhost’),username & password then save this file as wp-config.php . Finally run http://localhost/wordpress in browser address bar where ‘wordpress’ refers to location of extracted files in step one i.
,e if it’s under C:/xampp/htdocs then url should look like http://localhost/xampp/wordpress . This will initiate installation process for which you’ll need to provide some information related to site title ,admin user etc.. After providing all info click ‘Install Now’ button at the bottom of page , once done successfully log into admin panel by visiting http://localhosst/wp-login page with provided credentials & start exploring features !
Install WordPress Manually | FTP Database PhpMyAdmin
WordPress Download
WordPress is one of the most popular content management systems on the web and is used by millions of people around the world to create websites, blogs, and more. To get started with WordPress, all you need to do is download it from their website. The latest version of WordPress can be downloaded for free in a variety of formats including ZIP, TAR and GZIP files.
After downloading your chosen format, simply follow the installation instructions provided on their website to begin using WordPress quickly and easily!
How to Install WordPress Step by Step
Installing WordPress is a straightforward process that only takes a few minutes. To get started, you will need to create an FTP account for your web server and then download the latest version of WordPress from the official website. After downloading, unzip the file and upload all files to your web server using an FTP program such as FileZilla.
Next, you’ll need to create a MySQL database on your web host and configure it with your desired settings before running the WordPress installation script in your browser. Once setup is complete, you can begin customizing themes, plugins, widgets and more!
WordPress Setup Configuration
WordPress setup and configuration is an important step in launching a website. WordPress can be installed quickly, easily and free of charge through most web hosting services. Once the installation is complete, users can customize their site with hundreds of themes, plugins, features and settings to make it look and work just how they want it to.
With some basic understanding of HTML or CSS coding knowledge, users can further tailor their sites for maximum impact.
How to Install WordPress on Xampp
Installing WordPress on Xampp is an easy process and can be completed in a few simple steps. First, download the latest version of WordPress from its official website. Then, install Xampp and configure it by setting up the Apache server and MySQL database.
After that, create a new database for your WordPress installation using phpMyAdmin. Finally, extract the files from your downloaded WordPress package into the Xampp folder and run the installation script to finish setting up WordPress on Xampp!
How to Install WordPress in Your Computer
Installing WordPress on your computer is a great way to create and manage website content without having to use web hosting. To get started, you’ll need to download the latest version of WordPress from their website, extract the files into a folder, set up a database for WordPress on your server or localhost environment, and configure the wp-config file with the proper database information. Finally, run an install script provided in the downloaded package, which will guide you through setting up your site.
After that’s done you can begin creating content!
Install WordPress on Windows
Installing WordPress on a Windows computer is fairly easy. All you need to do is download the WordPress software package from their website, unzip it and then transfer it onto your web server via FTP. Once that’s done, simply run the installation file and follow the instructions in order to complete the setup process.
With this method, you can have a fully functional WordPress site up and running in no time!
How to Install WordPress on Windows 10
Installing WordPress on Windows 10 is a relatively easy process. First, you need to download the latest version of WordPress from wordpress.org and save it onto your computer. Then, using either an FTP client or File Manager in cPanel, upload the files to your webserver directory.
Once uploaded, you will need to create a MySQL database for WordPress using phpMyAdmin and configure the wp-config file with this information. Finally, access the install page through your web browser and follow the instructions provided by WordPress to complete installation!
Install WordPress Ubuntu
Installing WordPress on Ubuntu is an easy process that can be done in a few simple steps. First, you’ll need to install the necessary packages to your server such as Apache2, MySQL, and PHP. Afterward, download the latest version of WordPress and extract it into your web directory.
Lastly, create a database for WordPress using phpMyAdmin and configure the wp-config file with the appropriate information from your database. With these steps completed, you should have successfully installed WordPress onto your Ubuntu server!
Conclusion
Installing WordPress manually may seem daunting at first, but it is a straightforward process. As long as you have the right files and follow the steps outlined in this blog post, you should have no trouble getting your desired WordPress site up and running. With practice, installing WordPress manually can become second nature – making it easier to manage multiple websites or troubleshoot any issues that arise.
All in all, installing wordpress manually gives users full control of their website’s setup and security measures while allowing them to keep up with the latest updates.


